Written in Chinese, translated by Claude Sonnet 4.5.
This is the first article after this site went live. So I’ll use it to document how the website was built.
“ash’s Writing Archive” is a static website created with Hugo, with its files stored on GitHub, and content hosted and distributed by Cloudflare.
- Pros: Free, minimal, markdown, no server headache.
- Cons: No comments or other community features.
1. Install Hugo Locally
Hugo is open-source software for quickly building static websites.
I use a Windows PC. Run the following in WSL Ubuntu terminal:
wget https://github.com/gohugoio/hugo/releases/download/v0.135.0/hugo_extended_0.135.0_linux-amd64.deb
sudo dpkg -i hugo_extended_0.135.0_linux-amd64.deb
2. Create a New Site with Hugo
Create a new site in the path where you want to store the website files:
hugo new site rwen_me
cd rwen_me
The directory structure after creation is as follows:
tree -L 1 ./
# ./
# ├── archetypes
# ├── config.yaml
# ├── content
# ├── data
# ├── layouts
# ├── public
# ├── resources
# ├── static
# └── themes
First initialize Git (not just for version control, more on this later):
git init
git branch -M main
Then download the website theme I previously selected:
git submodule add https://github.com/CaiJimmy/hugo-theme-stack.git themes/hugo-theme-stack
Finally, replace the current blank site configuration with the default configuration that comes with the theme, and the website’s skeleton is complete.
cp ./themes/hugo-theme-stack/exampleSite/hugo.yaml ./
rm config.yaml
mv hugo.yaml config.yaml
3. Add Your First Article
Hugo’s default content format is markdown.
Create content/post/my-1st-post/index.md in the site root directory. This file needs at least two metadata items: title and date.
The first ten lines of this article’s markdown source code are as follows:
---
title: How to Build This Site
description: Free, minimal, markdown, no server headache
date: 2025-11-16
slug: how-to-build-this-site
categories:
    - Life
    - Tutorial
---
This is the first article after this site went live. So I'll use it to document how the website was built.
The default language for this site is zh-cn. Multilingual articles can be added in the same directory with translated versions like index.en.md.
In the future, to write new articles, simply continue adding markdown files with similar metadata in ./content/post/, and the website will automatically refresh.
For writing, I generally use vscode:
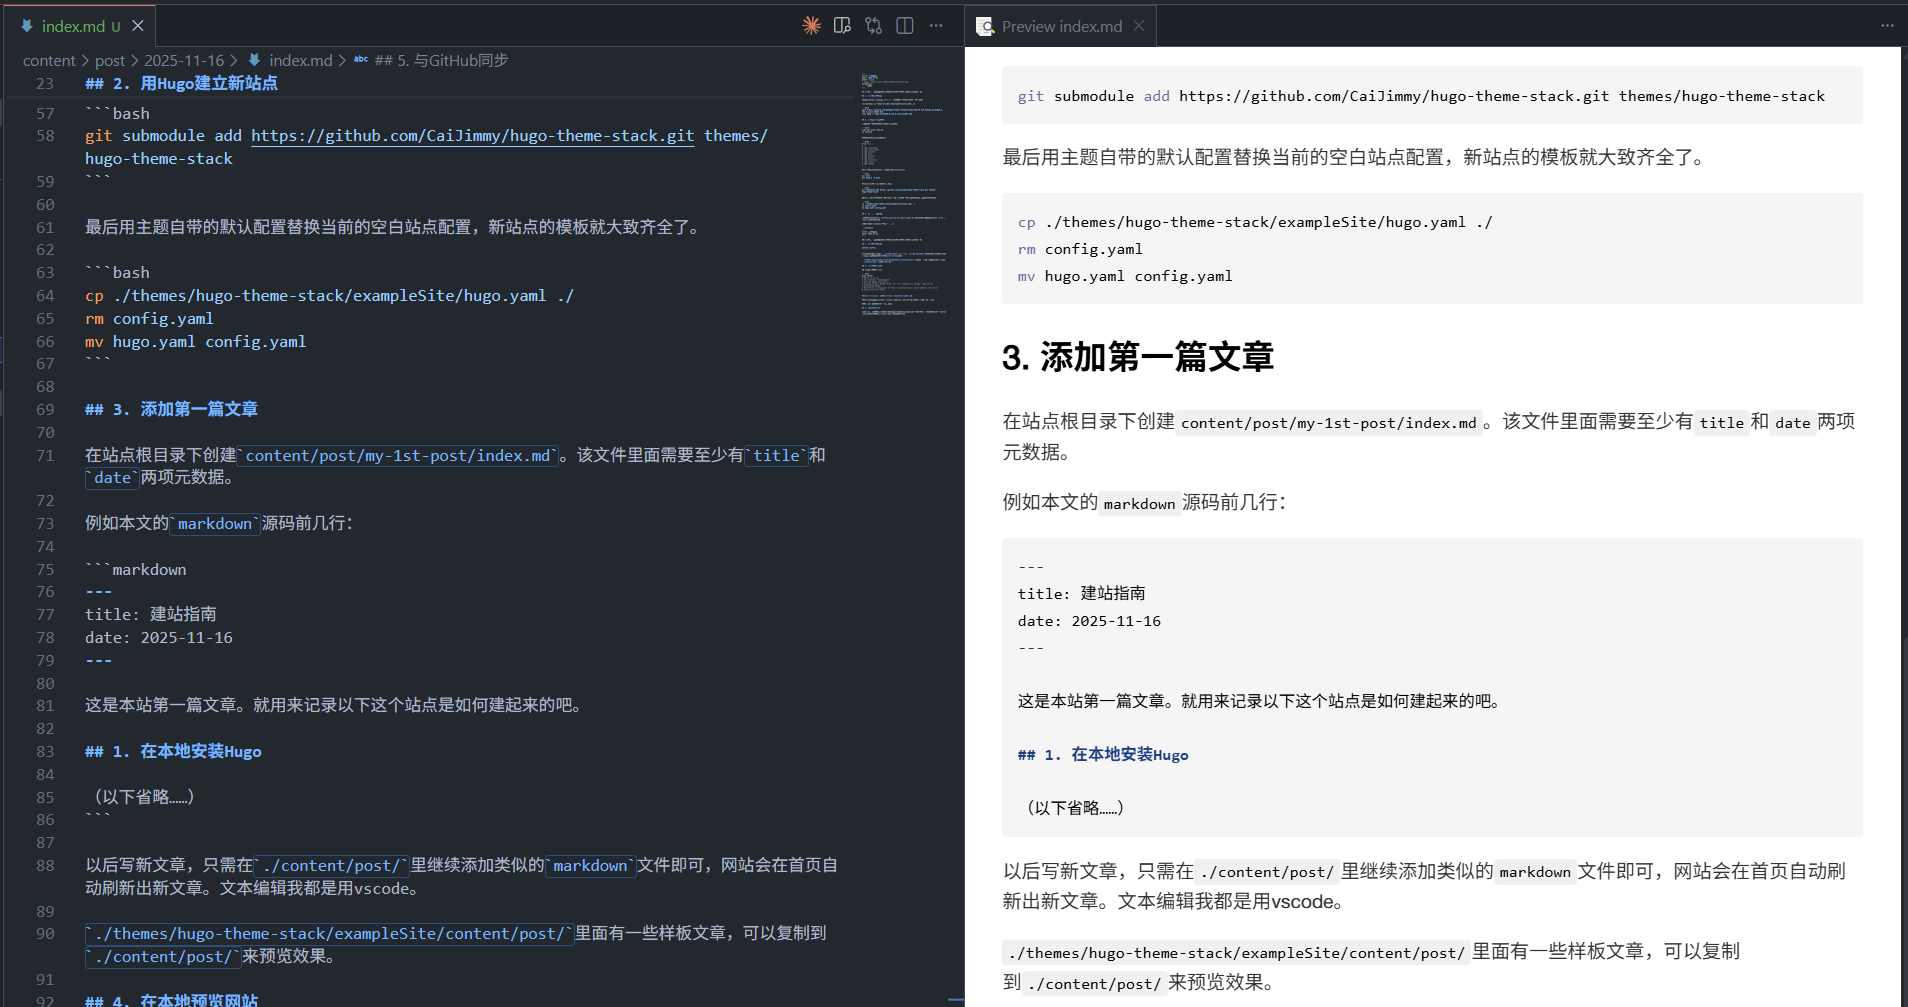
There are some sample articles in ./themes/hugo-theme-stack/exampleSite/content/post/ that can be copied to ./content/post/ to preview various effects.
4. Preview the Website Locally
Run the Hugo local server (--disableFastRender forces a rebuild after each code change):
hugo server --disableFastRender
# Built in 54 ms
# Environment: "development"
# Serving pages from disk
# Running in Fast Render Mode. For full rebuilds on change: hugo server --disableFastRender
# Web Server is available at http://localhost:1313/ (bind address 127.0.0.1)
# Press Ctrl+C to stop
Then open the website in your browser: http://localhost:1313/.
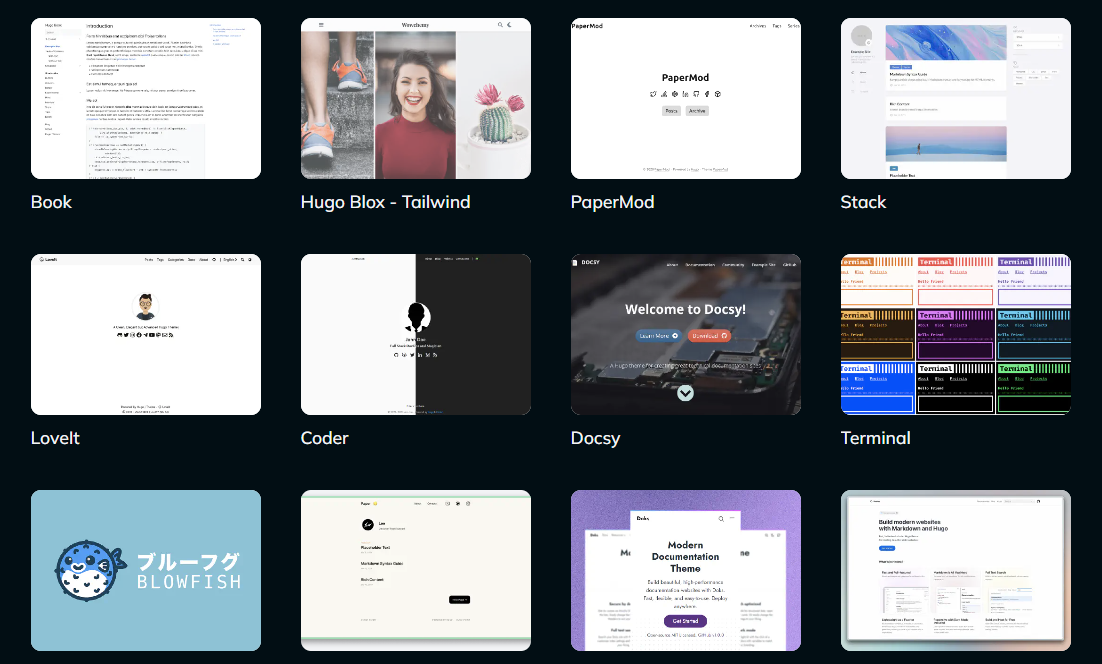
You can adjust the theme style to your liking following the official guide. Once you’re satisfied with the adjustments, you can prepare to go live.
5. Sync with GitHub
The purpose of this step is to store all site-related files in GitHub’s cloud. My website only has text and image content, so it’s impossible to exceed GitHub’s “100MB per file” and “5GB per repo” limits.
First, create a new private repository on the GitHub homepage. Mine is called rwen-me.
I usually sync local code directly using the vscode UI, but you can also:
git remote add origin https://github.com/xxx/rwen-me.git
git add .
git commit -m "init commit"
git push --set-upstream origin main
Of course, after writing new articles locally, you also need to push to GitHub first before they can actually go live.
When you don’t have a computer at hand, you can use GitHub’s free Codespace to open a vscode web app and edit and commit directly in the cloud. This essentially serves as a backend content management platform for the website.
6. Set up Cloudflare Pages
Because access to GitHub from China is very unstable, I ultimately chose the relatively smooth Cloudflare Pages. Most likely you don’t care about this, so I suggest simply using GitHub Pages. Both are free static website hosting services.
Cloudflare supports reading Hugo sites from GitHub repositories. Every time you push code, it automatically re-reads and compiles the website. Cloudflare’s free account has a limit of 500 syncs per month, which is more than enough for a personal website.
First, go to the official website to register an account. Then select Compute & AI -> Workers & Pages in the left sidebar of your homepage, and then select Pages -> Import an existing Git repository on the right. Follow the guided steps. When connecting your GitHub account, choose to let Cloudflare only access the relevant repo.
After completing the guide, Cloudflare will give you a <your_app_name>.pages.dev domain. If you want a personal domain, Cloudflare also provides one-stop domain purchase and management services, which is very convenient.
Your personal website is now live!